, please spend more than £50
Description
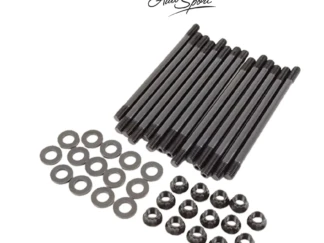
Installation Instructions:
1. To ensure proper thread engagement and accurate torque readings, clean ALL threads in the block. Chase if necessary with ARP Thread Chaser.
2. Clean and inspect all hardware prior to installation. Look for obvious defects or shipping damages, plus proper fit, length and dimension.
3. If the cylinder head studs protrude into a water jacket, lubricate the block threads of the studs with ARP THREAD SEALER.
4. Screw studs into the block “HAND TIGHT ONLY”.
5. Install the cylinder head(s) and check for binding or misalignment.
6. Lubricate the stud threads, nuts and washers with ARP ULTRA-TORQUE FASTENER ASSEMBLY LUBRICANT.
Then install the washers and the nuts onto the studs and tighten them hand tight.
ARP recommends using the ARP ULTRA-TORQUE FASTENER ASSEMBLY LUBRICANT that is provided with each kit as opposed to motor oil. This is due to higher friction on the studs as well as inconsistencies in the clamping force of the fasteners when motor oil or other low quality lubricants are used.
PRELOAD (TORQUE) RECOMMENDATIONS
7. Following the manufacturers recommended torque sequence tighten the nuts steps 1-3
Step 1: Tighten to 30 ft-lbs.
Step 2: Tighten to 60 ft-lbs.
Step 3: Tighten to 90 ft-lbs.
with ARP Ultra-Torque fastener assembly lubricant
Bolt Torque Sequence
7 3 1 5
9
10 6 2 4 8
1 Series
F20
F21
2 Series
F22
F23
3 Series
F30
F31
F34
F35
4 Series
F32
F33
F36
5 Series
F07
F10
F11
F18
X1 Series
E84
X3 Series
F25
X4 Series
F26
X5 Series
F15
X6 Series
F16
Z Series
E89 Z4
Please note: After initial assembly, it is necessary to allow the engine to complete a full heat cycle, then re-torque your head studs to spec. This means allowing the engine to warm up to its normal operating temperature, remain at operating temperature for several minutes to ensure each component is uniformly heated, then turned off and cooled completely to ambient temperature.